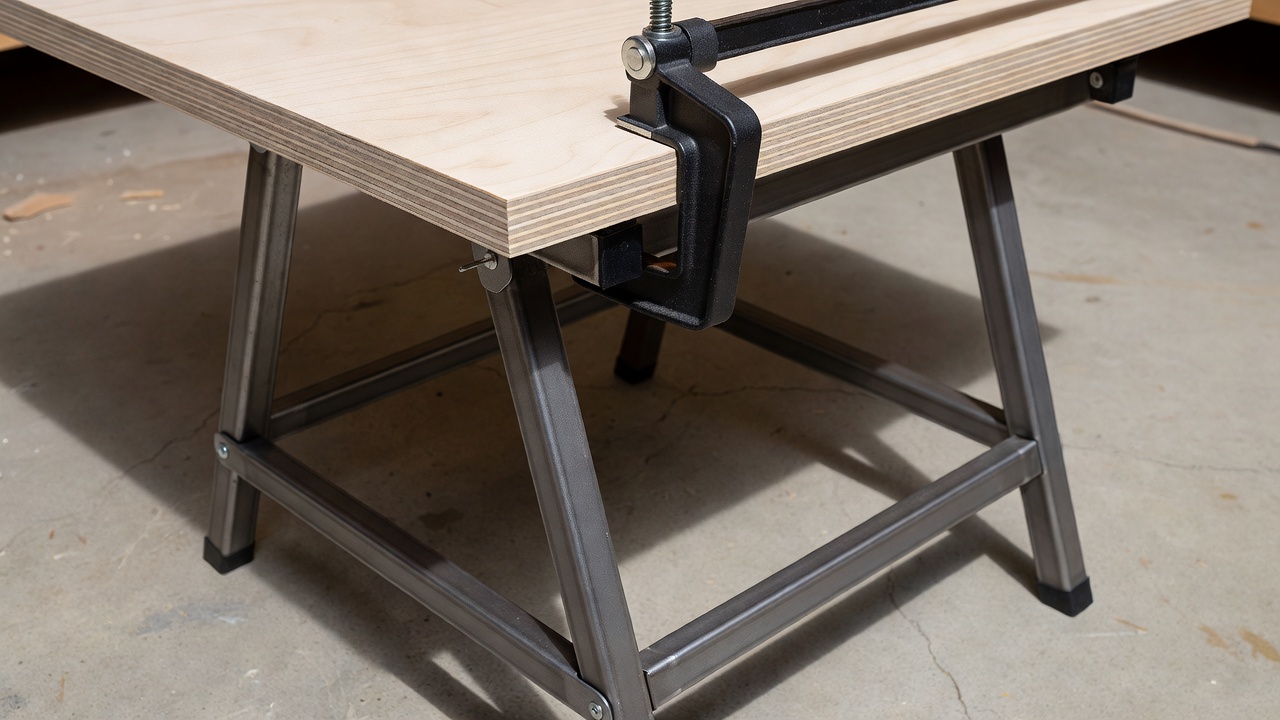
Choose the supports first
A folding bench made entirely from mixed scraps is a tempting first project, but moving joints and uncertain timber make stability difficult to predict. This plan takes a simpler route: make the replaceable top yourself and use a pair of commercially rated folding trestles. Read their instructions before cutting. Confirm that their permitted spacing, top width and clamping arrangement are compatible with this panel.
The result is a light-duty assembly and marking surface, not a platform, scaffold, step or engineered machine stand. Do not stand or sit on it. Do not bolt on a large vice, mount a saw or use it for forceful planing without a separately assessed design. A trestle’s advertised capacity does not establish the capacity of your homemade top, its attachments or the combined arrangement.
Cut list: removable top
| Part | Qty | Size | Purpose |
|---|---|---|---|
| Plywood top | 1 | 900 × 450 × 18 | Flat work surface |
| Long stiffener | 2 | 800 × 45 × 20 | Under front and rear edges |
| Sacrificial work pad | 1 | As needed | Loose protection for drilling |
The stiffeners run along the underside near the long edges, with their 45 mm dimension vertical and their 20 mm edges against the top. Centre each 800 mm length so it ends 50 mm short of each top end. Their exact sideways positions must leave flat, unobstructed support zones for the trestles and access for secure clamps. If that is impossible with your supports, stop and revise the arrangement before assembly.
Build sequence
Preserve the flat face
Lay the plywood on a known flat surface and check for rocking or twist. Reject delaminated or badly bowed stock. Mark the top from one reference edge and cut it with the whole sheet safely supported. Never leave a large offcut poised to fall or pinch the blade near the end of a cut.
Prepare the two stiffeners from straight, knot-free timber where possible. They must sit flush against the top rather than forcing a curve into it. Ease sharp edges with abrasive paper and remove splinters from the plywood perimeter. Do not cut carrying slots into the top; they weaken it and may interfere with support positions.
Dry-fit, then fasten
Set up the open, locked trestles on a level floor. Place the top and temporarily position the stiffeners underneath. Check that the support rails touch the intended flat zones and that the clamps can be fitted without distorting the top. Mark all contact and clamp areas in pencil.
Remove the panel to a safe assembly surface. Predrill through the top into the 20 mm stiffener edges, with countersunk heads flush to the work face. Suitable wood glue and screws around 4 × 40 mm may suit this 18 mm plus 45 mm geometry; verify the actual screw path and pilot dimensions. Space screws along each stiffener, avoiding damaged wood and end splits. Clamp flat and allow the glue to cure fully.
Secure every setup
Open and lock the supports according to their instructions each time. Secure the top using the support manufacturer’s permitted clamps or attachment system; a loose board resting on trestles is not this build’s finished setup. If the supports cannot accept a secure top attachment, choose different supports.
On a level, firm floor, check that every foot bears evenly and the top cannot slide, lift or tip under light hand pressure. Stop if there is rocking, sagging, a slipping clamp or an incomplete leg lock. Do not correct a bad floor with a stack of loose scraps. Keep expected work over the supported area and never lean heavily on an overhanging corner.
Work within a small top’s limits
Clamp the workpiece without reaching under a potential cut path. Put a sacrificial pad beneath drilling work and confirm that the bit cannot hit a trestle or fastening. Long boards need separate, compatible support so they do not lever the top sideways. Keep cords, dust hoses and offcuts away from the feet. If the job needs substantial pushing, hammering or weight, move it to a suitable fixed bench.
Can I add casters?
Not to this arrangement. Casters change the footprint, height and resistance to sideways force. Use purpose-designed mobile supports with locking systems if mobility while assembled is essential.
Pack it down without a pinch
Clear and unclamp the surface before lifting the top. Carry it with two hands if comfortable; ask for help if its size or weight is awkward. Store it flat or securely restrained upright where it cannot fall. Fold the empty trestles using their handles and keep fingers away from hinges. Recheck screws and support locks before the next session.
Use the smallest remaining pieces in the offcut tray and utility stool plans.